Required Items:
- 1x Styro Cones (depending upon your tree size) (Buy cones here)
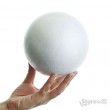
- 50-80x Styro Balls multiple sizes 10cm, 15cm etc.” (Buy Styro Balls here)
- Styro Sheet W 60 CM x L 100 CM x T 5 CM (Buy Styro Sheet here)
- Glitter (Red or depending upon the event)
- Foam cutting blades/knife
- Foam Glue
- 100x BBQ wooden skewers
- Sandpaper
- Painting equipment and paint Red and Grey (your own choice, depending on theme)
Steps & Procedure:
Place the Styro Sheet on a table or at a table height. The purpose of Styro sheet underneath is to avoid paint spills and keep your work area clean. Now place the Styro Cone firmly over Styro Sheet and start painting. Once the paint is done, let it dry for some time.
In the meanwhile start painting & glittering Styro Balls. Make sure after painting each Ball pour glitter over balls and let them dry. Paint & glitter all the balls one by one with colors of your choice. Choose the ball quantity based upon the cone height to cover it.
Once the balls are dried, cut 1/3 of each ball to paste it over the Styro Cone. Don’t throw the cut pieces you will use them later to fill the gaps on Styro Cone.
Use skewers and glue to stick the balls over Styro Cone. Mix the ball sizes while placing on Styro cone. Make it symmetrical & give it a shape of the tree with balls all over it.
Finish the tree by sticking a ball on the cone top. Now your tree is ready to be displayed at your home, party or event.
Place the Styro tree under a fan or airy place to let all the glue and paint dry. Watch out for glitter it comes off very easily while touching. Place it carefully over a round table for the best display.


